Page 6 of 11
Re: Edit your pictures.
Posted: Sun May 04, 2014 11:41 pm
by GHOSTHUNTER
A forum member has asked me how to draw arrows onto images to highlight something or to point to an area in the image. The included image below is how I do it using a laptop operating Windows Vista home premium, if you are using the older Windows XP or the newer Windows 7, or 8, then the process is slightly different, but the basics are the same.
To view all of it you will have to left click on the image to open it up, or better still, right click on the image and select 'Save image' into one of your folders.
GHOSTHUNTER.
Re: Edit your pictures.
Posted: Mon May 05, 2014 11:14 am
by motorman
Thanks for the tutorial mate. That certainly helps me.
Avatar images.
Posted: Fri May 01, 2015 7:08 pm
by GHOSTHUNTER
Some members like to change their Avatar image and while the method of doing this is pretty straight forward, it seems there are problems with the sizes of images we want to use for an Avatar.
To used a few forum member's Avatars as an example, the Avatar used by "Idris" is 90x90, 90 pixels wide by 90 pixels high, the one used by Nick Jones is 90x73, the one used by "Johnboy" is 87x65 and my own is also 90x90.
To make any picture of your choosing about the same size as these examples, you simply load a picture into the 'Paint' program on your computer (mobile devices will be totally different, I have no experience of those, so sorry I can not help with those).
The following screen-grabs are deliberately large for clarity, but if you left-click you will see more of the image, or you can save them to a folder and view them in full later. If you leave the scroll-bars in place and scroll them around you will also see the rest of the image.
Once the image is in 'Paint', this is what you should see below...
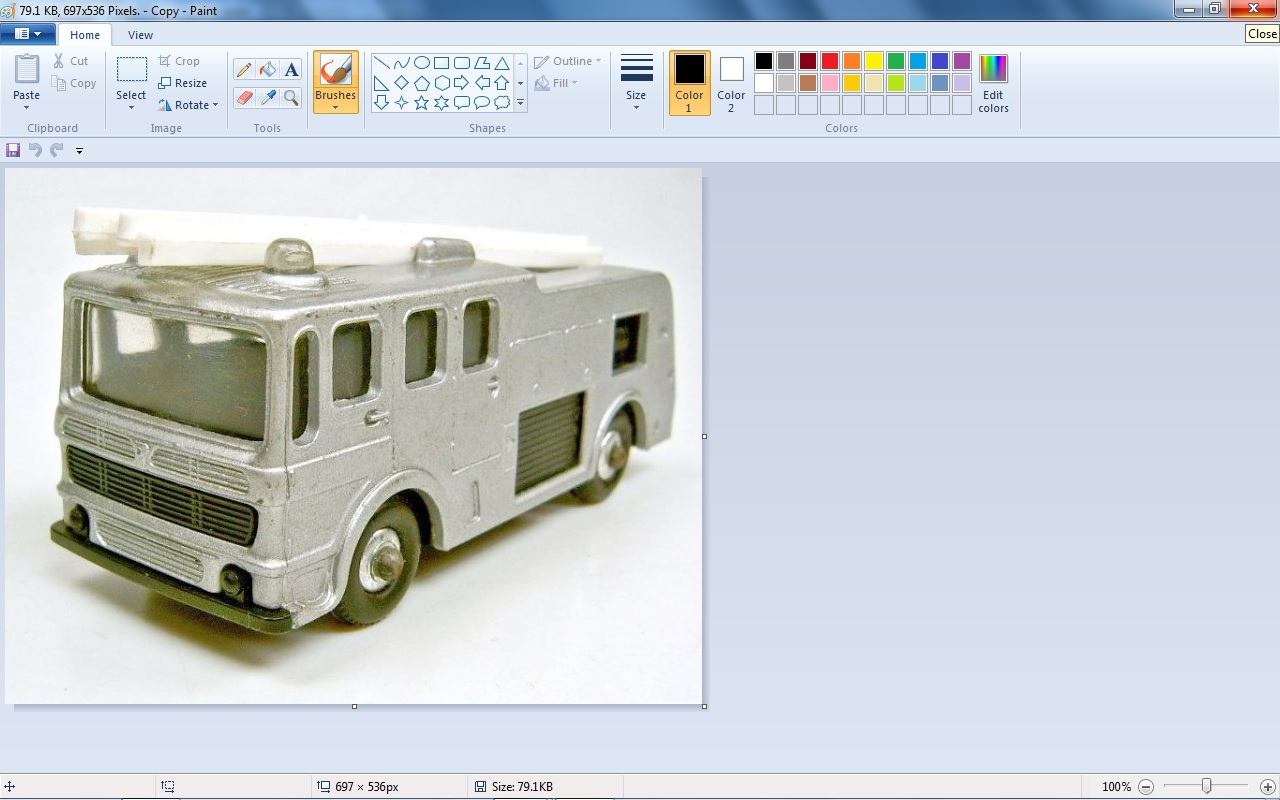
- Paint 1..jpg (181.39 KiB) Viewed 5030 times
Re: Edit your pictures.
Posted: Fri May 01, 2015 7:17 pm
by GHOSTHUNTER
The above screen-grab is from a 'Windows 7' laptop, 'Windows Vista' is completely different but actually easier to navigate around the paint options.
The chosen image is 697x536 pixels, what I will do is reduce the pixel numbers for width and height.
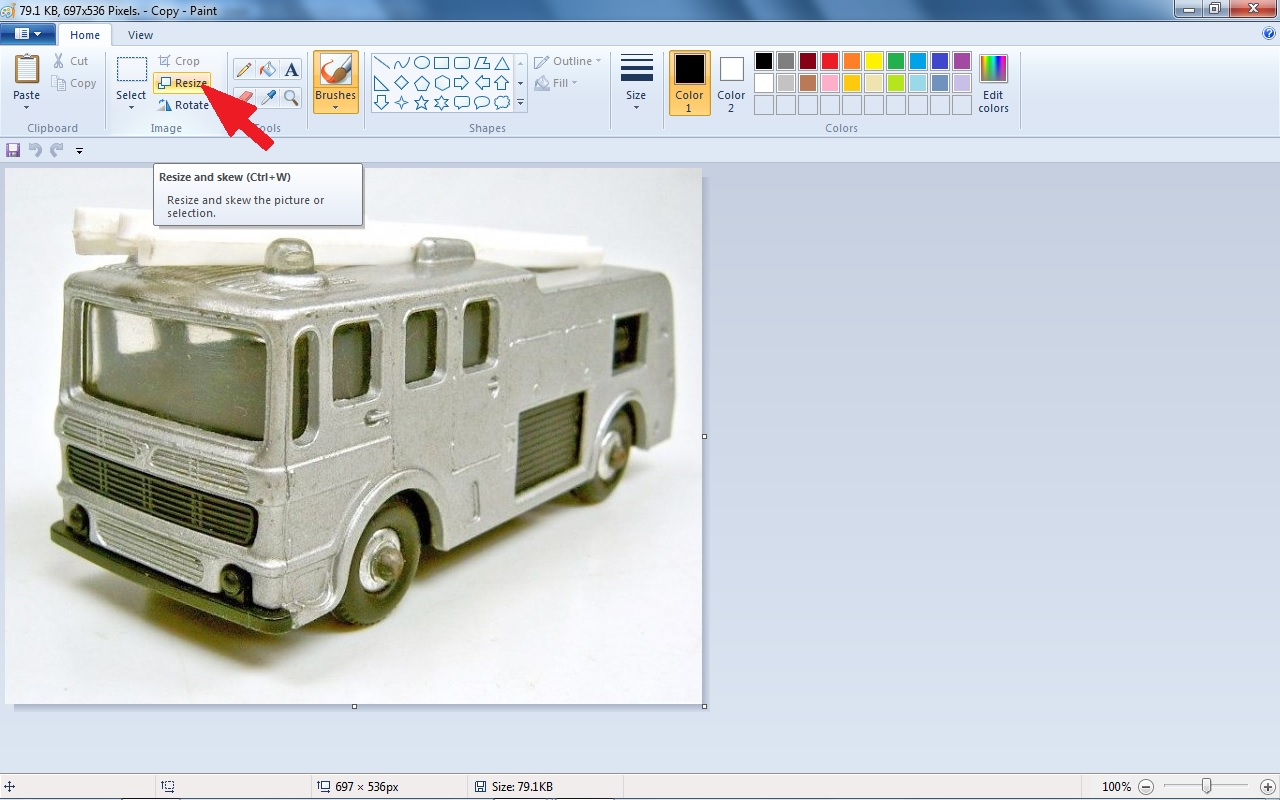
- Paint 2..jpg (187.98 KiB) Viewed 5030 times
In the above screen-grab I have highlighted the 'Reduce' button, click on this and we will see the next screen.
Re: Edit your pictures.
Posted: Fri May 01, 2015 7:20 pm
by GHOSTHUNTER
This is what you should now see.
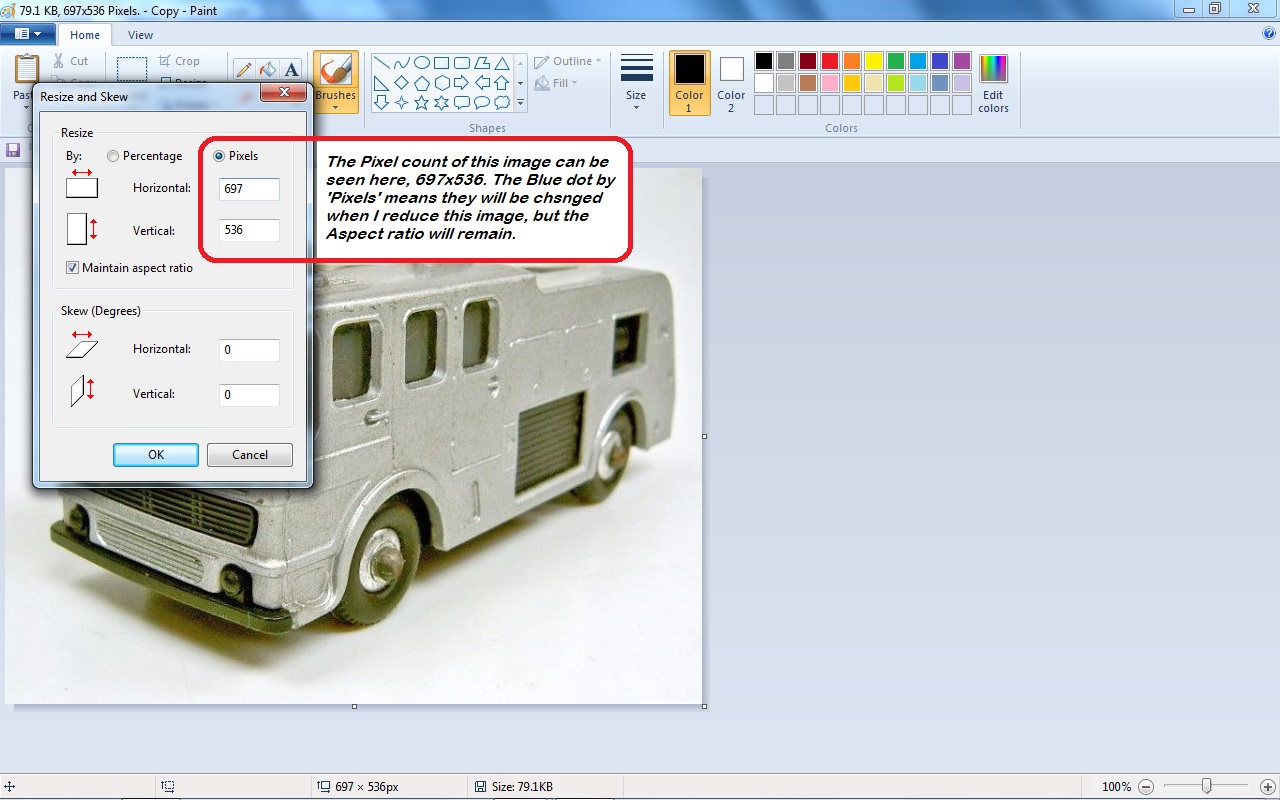
- Paint 3..jpg (198.73 KiB) Viewed 5030 times
The options box for reduction etc. You can see the numbers of pixels has gone into the fields for both Horizontal and Vertical (Width and Height).
Re: Edit your pictures.
Posted: Fri May 01, 2015 7:24 pm
by GHOSTHUNTER
I have changed the number of pixels to just 100 for the Horizontal (Width), and the Vertical (Height), has automatically been changed to 76, this is because I have left the Aspect Ratio box ticked.
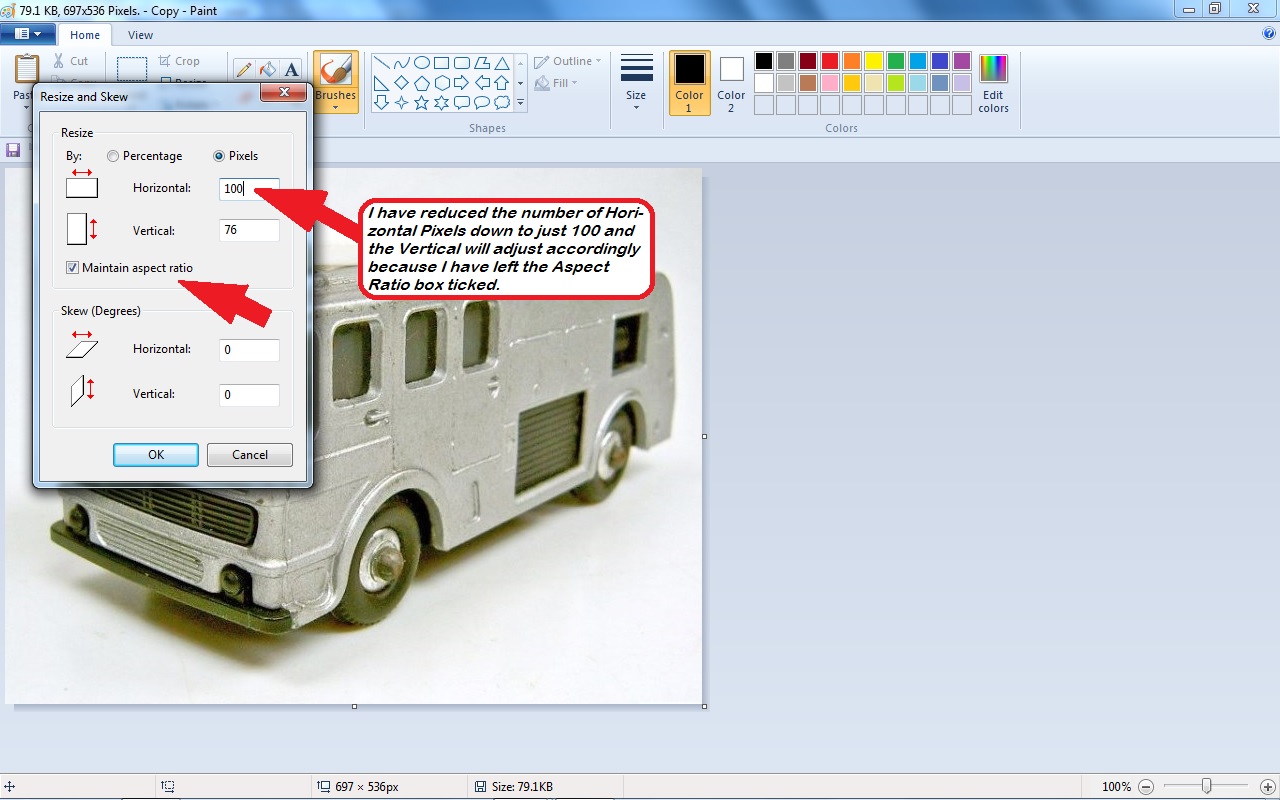
- Paint 4..jpg (197.67 KiB) Viewed 5030 times
Re: Edit your pictures.
Posted: Fri May 01, 2015 7:26 pm
by GHOSTHUNTER
Now, when I click 'OK' or 'Apply', this is what I now see...
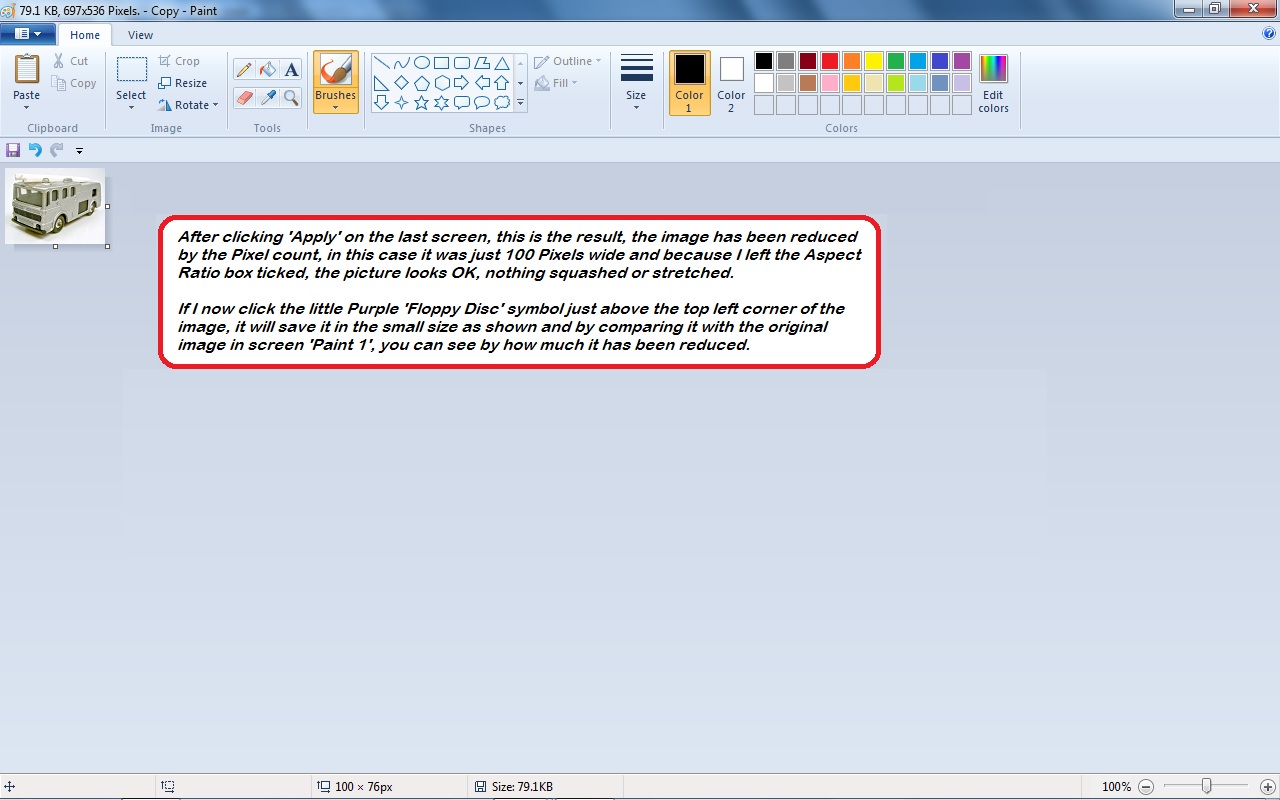
- Paint 5..jpg (174.3 KiB) Viewed 5030 times
...a drastic reduction in the size of my image.
Re: Edit your pictures.
Posted: Fri May 01, 2015 7:28 pm
by GHOSTHUNTER
You can save that as an Avatar picture, it might just load, but I expect it may need some further tweaking to get it nearer the 90x90 size of those examples I mentioned earlier.
Re: Edit your pictures.
Posted: Fri May 01, 2015 7:36 pm
by GHOSTHUNTER
While we are on the subject of reducing pictures, the screen-gran below shows hat will happen to the image if we un-tick the Aspect Ratio box...
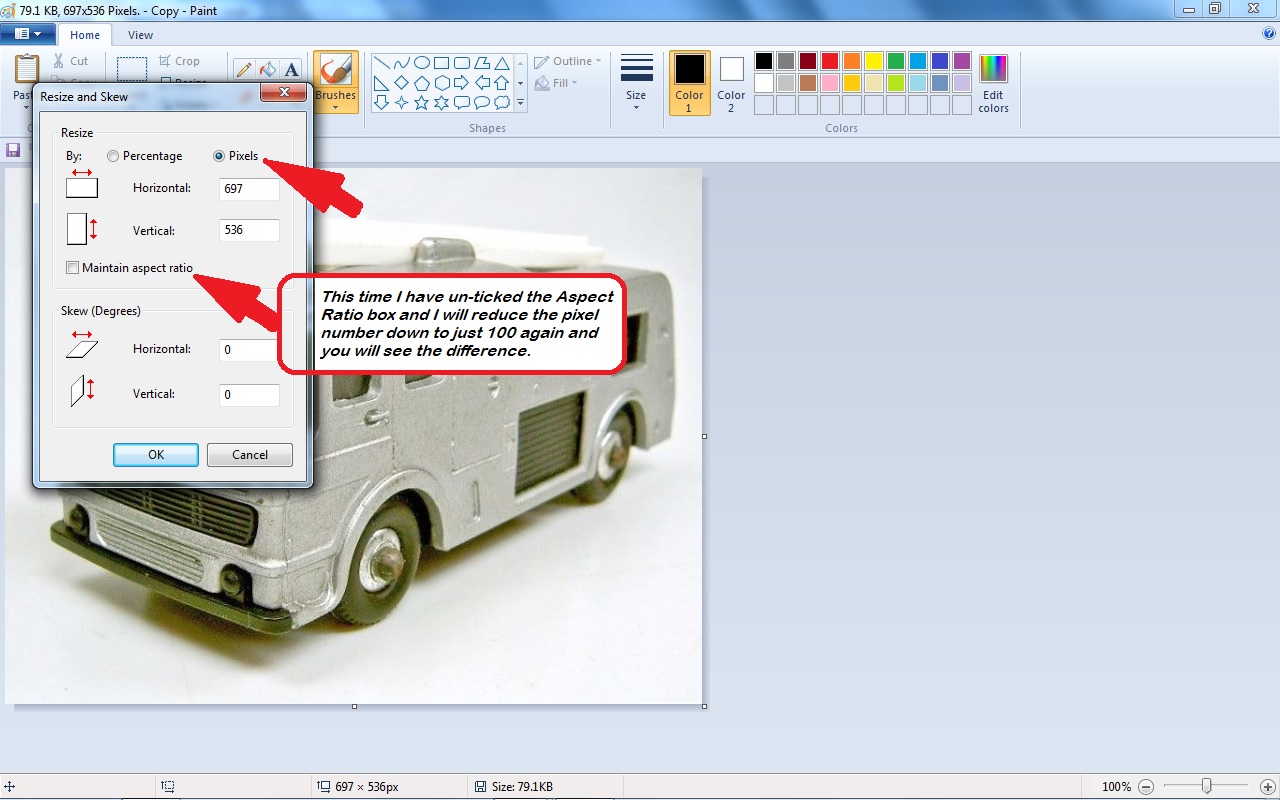
- Paint 6..jpg (190.49 KiB) Viewed 5030 times
...I started with my original 697x536 image, un-ticked the Aspect Ratio box and I will reduce the pixel numbers back down to just 100 for Width and Height.
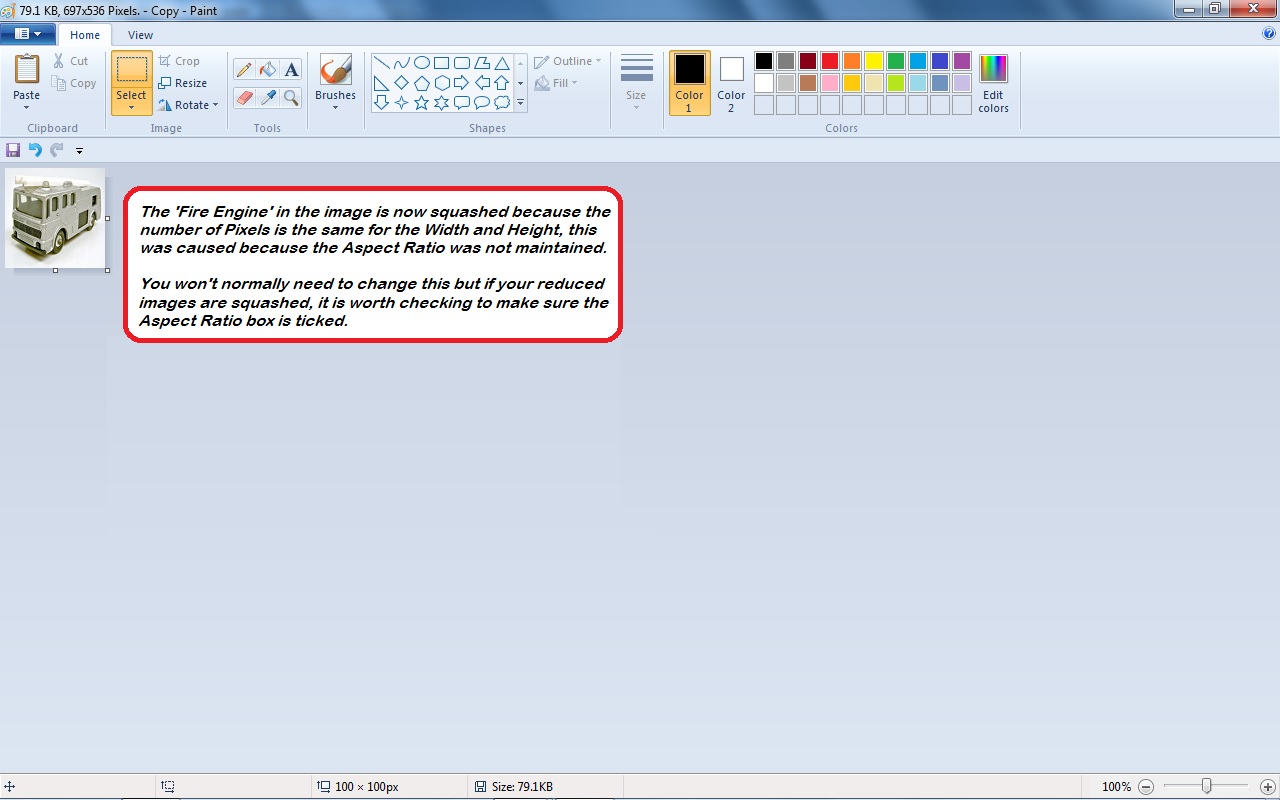
- Paint 7..jpg (146.2 KiB) Viewed 5030 times
...and the result is a squashed image!
GHOSTHUNTER.
Re: Edit your pictures.
Posted: Fri May 01, 2015 7:44 pm
by GHOSTHUNTER
If you go back to the screen-grab, 'Paint 3', change the pixel number for Width and Height to between 80-90x80-90 and click 'OK' or 'Apply' and this should be OK for an Avatar image, if not open it again from your picture folder into paint and you will see a small image in the top left corner, just as in the screen-grab, 'Paint 5' and reduce the image by the percentage with something like 75%, click save and see what that looks like and by hovering your cursor over the image it should tell you the file size and image size regards the pixels.
GHOSTHUNTER.