First Resto
Re: First Resto
I use cotton soaked in superglue. Hang a length of cotton or thread (depending on the thickness you need) and tie a heavy weight to one end to keep the cotton dead straight. Dribble superglue (or to be more precise .... "Syroflex") from the top then wipe downwards with plastic gloved fingers.

Re: First Resto
How flexible is the resultant cord?AJR wrote:I use cotton soaked in superglue. Hang a length of cotton or thread (depending on the thickness you need) and tie a heavy weight to one end to keep the cotton dead straight. Dribble superglue (or to be more precise .... "Syroflex") from the top then wipe downwards with plastic gloved fingers.
-
GHOSTHUNTER
- Moderator
- Posts: 12249
- Joined: Sun Sep 15, 2013 4:12 pm
Re: First Resto
On my Phantom II, I stuck one end of the Copper wire to the body where it needed to be, at the edge where the back of the bonnet sits. You need a steady hand while the glue sets and to keep the wire straight. When set it is possible to pull on the wire gently while moving it close to the body contours. While holding in place, another dab of glue applied with another piece of wire or even a fine modelling brush, but with a brush you run the risk of the bristles getting stuck where you don't need them, so wire or fine plastic strip is better.
When the Copper wire has been fixed in several places, it needed some fine adjustment to make certain it was in the right place, even the tiny section already glued in place can be unstuck with a scalpel blade, just for that final little bit of adjustment and re-glued.
When I was happy it looked smooth, no crinkles and was touching the whole length of the body it was secured along its whole length with the body colour paint, which as you see in the picture is gloss Black, so in effect it is the paint keeping the new body trim secured to the body.
This particular model has a nice curvy body and the thought of replacing the cast-in detail was a bit scary, but I was certain I could do a good job and I am very pleased with the result because when the model is in hand, it really makes a difference to the accuracy of the finished look.
The process was easier for me with Copper wire rather than using plastic strip, but plastic was used for other details on the model.
Solder was used on the wheels to give the distinctive American Rolls-Royce design of wheel with the little gap around the circumference of the spokes and a small circle of solder was use on the centre of the spare wheels then solder again for wheel locking handle in the very centre.
The windscreen is glazed with slightly tinted plexiglass.
The Spirit of Ecstacy mascot is a single piece of wire formed into shape, filled with solder and soldered onto a shirt pin that's had the ball filed flat so She has something to stand on. The whole mascot and pin is then passed through some plastic tubing which slots into a pre-drilled hole in the top of the radiator cap. More plastic tubing is then glued to the bottom of the pin so it does not fall out. The first longer piece of tubing is glued to the back of the grille allowing the finished mascot to be turn like the real car witch has to be done so the bonnet can be opened without hitting the mascot!
Of course the underside has also had some attention with working suspension and steerable front wheels, engine detail with a revolving fan blade operated from one of the rear wheels!
Ghosthunter.

Re: First Resto
Looks like a lot of fine detail work went into that Rolls Ghosty !
I've made a bit of slow progress on the 17b trying to get some of the casting lines back using the wire method. Starting to get the hang of it, and hopefully will get better at it. Still have more to do, but it's coming along. have some edge lines around the box and wheel arches now.
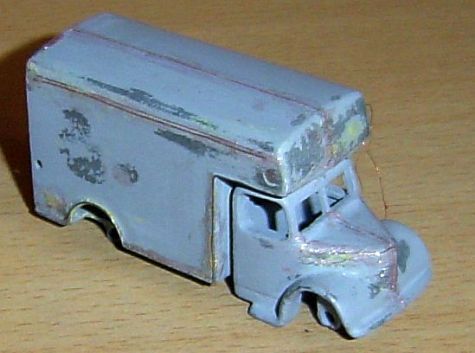
I don't drill holes in the casting to start the wire, I just glue the end down, let that set then pull it tight as you mentioned and work my way down to complete the run, gluing as I go. Not using superglue, as my experience with that in the past is that it is rather runny and tends to go all over the place. My glue of choice is nail varnish, it has some viscosity to it and tends to pull back into itself rather than running all over, it seems to tack up pretty quickly holding the wire yet allowing me a bit of time to move it around and then dries fairly quickly. In the end - as you also mentioned- I'm figuring that the paint will hold everything in place when its finished.
zBret
I've made a bit of slow progress on the 17b trying to get some of the casting lines back using the wire method. Starting to get the hang of it, and hopefully will get better at it. Still have more to do, but it's coming along. have some edge lines around the box and wheel arches now.
I don't drill holes in the casting to start the wire, I just glue the end down, let that set then pull it tight as you mentioned and work my way down to complete the run, gluing as I go. Not using superglue, as my experience with that in the past is that it is rather runny and tends to go all over the place. My glue of choice is nail varnish, it has some viscosity to it and tends to pull back into itself rather than running all over, it seems to tack up pretty quickly holding the wire yet allowing me a bit of time to move it around and then dries fairly quickly. In the end - as you also mentioned- I'm figuring that the paint will hold everything in place when its finished.
zBret
-
GHOSTHUNTER
- Moderator
- Posts: 12249
- Joined: Sun Sep 15, 2013 4:12 pm
Re: First Resto
Coming along really well and Varnish is one of my methods of securing small delicate items. When and if you need to make a new grille, this will be great fun as there is a really easy way to to do this.
Ghosthunter.
Ghosthunter.
-
tractorboy

- Posts: 670
- Joined: Fri Sep 27, 2013 9:25 am
- Location: Auckland
- Contact:
Re: First Resto
Some useful tips for restoration work, especially with that moulding.
Here's a really good tool for modelling - it has a fluorescent light and can be manoeuvred around.
Here's a really good tool for modelling - it has a fluorescent light and can be manoeuvred around.
- IMG_7645.jpg (63.9 KiB) Viewed 1485 times
"What one loves in childhood stays in the heart forever." ---Mary Jo Putney
Rodger
Rodger
Re: First Resto
Rodger that piece of equipment is exactly what I need !
Certainly looks like it would come in handy.

zBret
Certainly looks like it would come in handy.
zBret
-
GHOSTHUNTER
- Moderator
- Posts: 12249
- Joined: Sun Sep 15, 2013 4:12 pm
Re: First Resto
I don't own anything like that, everything I do is by the naked Eye. I don't have a work bench or area where I can sit down and have everything to hand. When the Black Rio Phantom II was made I don't remember what I used to work on, but probably my knees like I have done with most of my creations. I will find a top of a desk or table to work on, but all the work then has to be put away until the next time I do something, very inconvenient, but something I have got used to.
Ghosthunter.
Ghosthunter.

Re: First Resto
Congrats zBret on undertaking your 1st resto.  Quite a monstrous challenge for a beginner i say but im sure the end result will be rewarding.Kindly continue to post progress pic when available.
numi
numi
numi
One cannot do much with all the monies in this world but can do much more if he strives toward contentment.
One cannot do much with all the monies in this world but can do much more if he strives toward contentment.
Re: First Resto
Ghosty what you mentioned above made me think to the old adage " If there's a will there's a way " I often find myself trying to make do with what I have at hand, to work with and often times will "make" something rather than buying it.
zBret
zBret