Hi,
I am sorry to bother anyone with this especially as it may have been covered before but I have a mini which needs new window pillars at the front. After doing some reading I have cut and glued some staples into position but I wanted to know what filler you Chaps generally use? I am in the UK so it would help if someone could name something that is available here.
Incidentally I bought some Astonish Wood Floor Polish as recommended in a post on here and it does seem to enhance the paint on a model....so I know I will get sound advice!
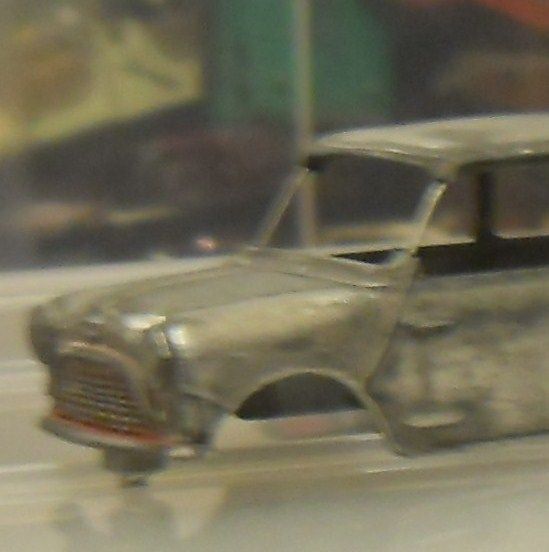
http://i754.photobucket.com/albums/xx18 ... 3ee8bb.jpg
Sorry about the picture quality. I have only worked on two models and they are both Corgi minis bought from local jumble sales for 10p each, this is probably the cheapest way that I will learn how to do this. I hope to post completed pictures as soon as the glazing arrives.
Thanks in advance.
Window Pillars, how to fix them?

Re: Window Pillars, how to fix them?
I've used the pillar from the exact same model (which has body damage elsewhere). From similar models and cut them to fit. Made them from styrene plastic and in a few cases, I molded them from resin. It's difficult work on 1/64 and smaller models and the model is "delicate" when the repair is complete (extra care is required when working on the model and even painting them). Working on kingsize models, Dinkys, Corgis, etc. is a bit easier because the model scale is larger.
It might be time to start my "Bucket List."
-
GHOSTHUNTER
- Moderator
- Posts: 12249
- Joined: Sun Sep 15, 2013 4:12 pm
Re: Window Pillars, how to fix them?
Hello Carl001, on the particular Mini with the missing front pillar, I would file the two sound sections to a nice flat surface. Then with some over-sized plastic sprue, cut a piece that is a tight fit into the area where you have put the staple. On the inside surface (where it may touch the model's glazing), I would file and smooth it down to match the profile of the sound sections top and bottom until it is not easy to detect you have put a section in the gap, then glue some thin 'plasticcard' over the whole pillar from top to bottom and let set for a Day. When set, you can carefully cut away the surplus plastic but leaving the whole inside of your new pillar covered with plastic.
With the inside now secure, you can work gently on the visible, outside of the pillar. If your handy with a sharp modelling knife, carefully cut away the surplus plastic, but without going too deep and try not to hit the metal of the remaining top and bottom parts of the pillar. If your not up to this treatment with a knife, gently smooth away the plastic with fine files and something like a finger-nail sanding board, it will take a little longer but will be more controllable.
When it comes to matching the actual profile shape to the plastic, to suggest there is a windscreen rubber running along the length of the pillar, very carefully smooth the area with a file (this is where a sharp knife would be better), working up and down the pillar while checking the profile as you go. Finish off with really fine wet-n-dry (No.400).
As you may have noticed, the Mini has it's rain-water drainage strip running all the way down this front pillar, so with another straightened staple or some fine plastic strip, cut to fit and glue this in place and when gluing areas such as this, I do tend to cover the whole area with glue (Superglue), as this will smooth as easily as the plastic beneath it, leave for another Day to set.
Give it a try and amaze yourself!!
Ghosty.
Re: Window Pillars, how to fix them?
Thanks for the tips Chaps....this is a bit more involved than I thought but it does sound doable. Thanks again....I will post the result if it looks anything like reasonable.