Page 14 of 64
Re: My latest news
Posted: Wed Sep 30, 2015 1:19 pm
by Idris
Looking at the rivet, I would drill it out a tad more. Looking at the photograph, the window insert must have been added by first sliding it into the windscreen surround and then raising the back part into position. Removal will therefore the reverse, i.e. lower the rear part first (in effect pivoting the insert on the dashboard) and then pull the windscreen backwards out of the surround.
Re: My latest news
Posted: Wed Sep 30, 2015 3:42 pm
by Malibu
Idris wrote:Ummmm......I have the idea I'm missing something here, but surely the way to remove the window insert is to drill out the retaining rivet.
GHOSTHUNTER wrote:(and it does look like Stephan has attacked the rivet
I already drilled the rivet as you can see here

- (c) Malibu
- Caddy_1.JPG (39.57 KiB) Viewed 985 times
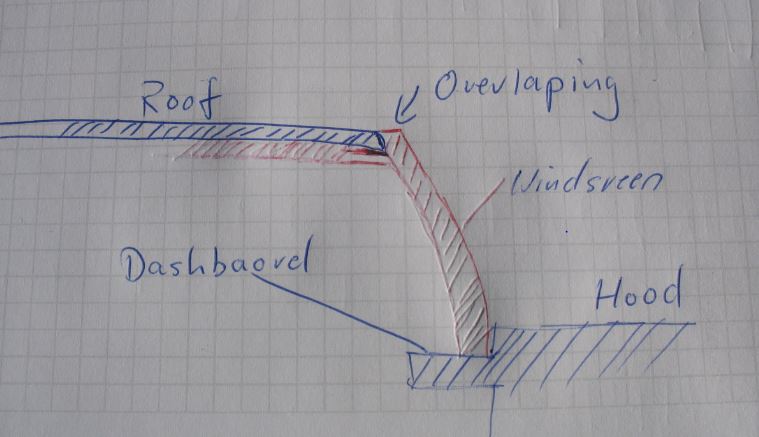
The problem is that the window inlet snaped while mounting it over (or into?) the roof.
I do not no how to explain in englisch so I made a scetch cutting thrue the middle of the model.
I think the only possible way is to cut the overlapping part of the windscrenn off?
- (c) Malibu
- Caddy_2.JPG (45.99 KiB) Viewed 985 times
Stephan
Re: My latest news
Posted: Wed Sep 30, 2015 4:19 pm
by Idris
What an odd (and unnecessary?) construction! I can now see why you're having problems - easy to fit, almost impossible to remove.
Re: My latest news
Posted: Wed Sep 30, 2015 7:58 pm
by Idris
IIRC, Joe (Tinman) did a whole run of these in black for the late MCCH. He may therefore know how to get the glazing out in one piece (although I find myself wondering if he didn't use replacement clear window inserts in the repainted models).
Re: My latest news
Posted: Fri Oct 02, 2015 10:27 pm
by Tinman
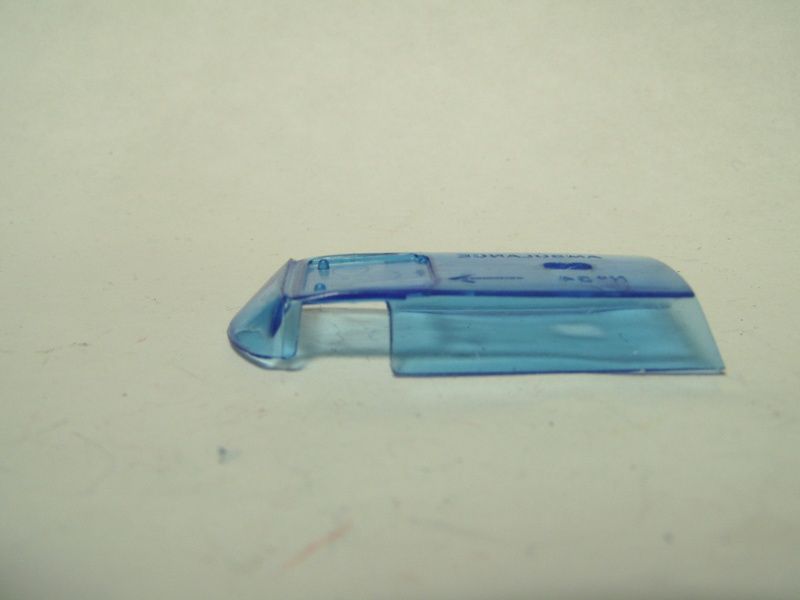
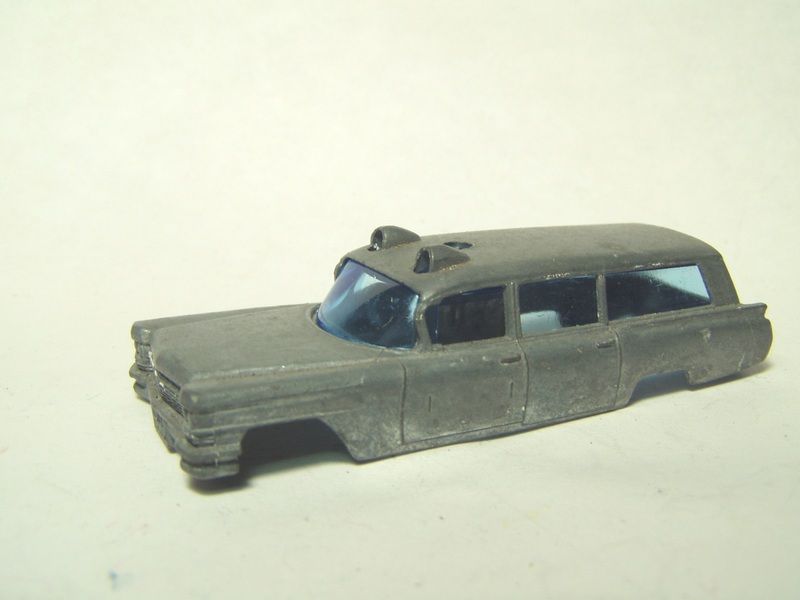
Playworn examples of this particular model often have damaged windows. They look OK until you go to take out the window and they break into two or three pieces. Yes, there is a lip at the top of the front windscreen ... but it should not be outside or in front of the roofline. That lip rests just behind the windscreen opening and up against the inside of the roof. When the model is stepped on, it often pushes down the front of the roof right at the windscreen The lip is there because there is a recess or pocket molded into the window insert that allows room for the trident like red warning lights. Stepping on the model often pushes down on the center plastic beacon and can that often cracks and/or breaks the window insert.
The model in question had to be stepped on, bending down the roof line right in front of the windscreen, pushing down on the window insert via the beacon and causing the lip (which under normal conditions does not reach forward enough to be seen) ... and causing the lip to be forced out and up where it does not belong. If you have done everything you can to get the windows out without breaking them, then you may have to break them to remove the window insert. Once the windows are out (broken or intact), you will have to straighten the body and get the roof back into position. At this point usually one or both of the very thin and fragile A Pillars will possibly break. If you can straighten the roof without breaking the A Pillars, and if you have to break the window insert, a new replacement window insert is 2.10 Pounds Sterling from Steve Flowers.
Here is a pic of the window insert, that lip is not designed to be outside of the window opening is is only so the window goes all the way up to the inside roof of the model (because of the recess for the plastic light casting).
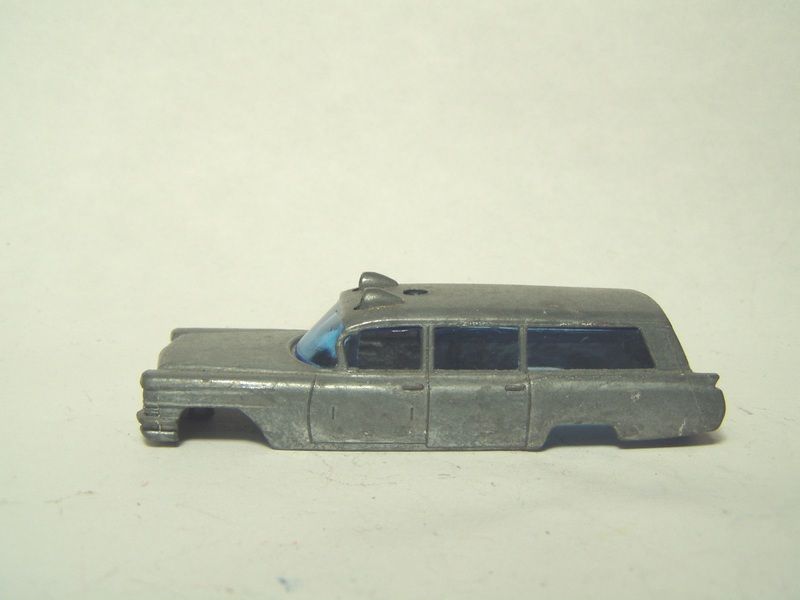
Here is a body that's not damaged and you can see that the windows do not protrude beyond the inside of the roof line.
My experience with restoring play worn examples of the 54 ambulance was that it took about three cars to make one restored model. Between the broken window inserts and broken or breaking A Pillars, they are a hassle to restore.
Re: My latest news
Posted: Sat Oct 03, 2015 2:39 pm
by Malibu
Tinman wrote:The model in question had to be stepped on, bending down the roof line right in front of the windscreen
I have locked at my other model and I still think that the windscrenn is made for snap in.
Also at pictures in Ebay or elswhere it looks the same to me.

- (c) Malibu
- Cadillac_windscrenn.JPG (14.69 KiB) Viewed 904 times
Thanks for the hint to the spare-part by Steve Flowers - I will place an order and ask him what he thinks about it.
Today there was a modelcar market at the Mercedes-Benz Museum in Stuttgart.
I picked up this models.
The tourquise bus costs me 3 Euros I´m happy with it.
I hope I can remove the paint on the Bedford tipper.
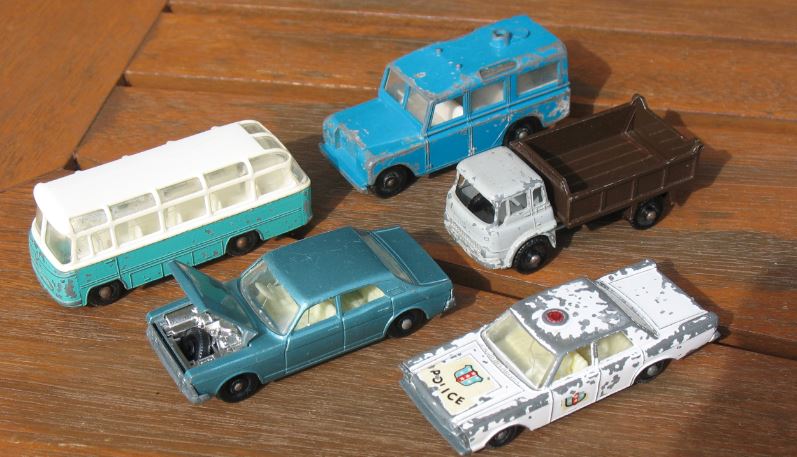
- (c) Malibu
- News_03102015_1.JPG (76.72 KiB) Viewed 904 times
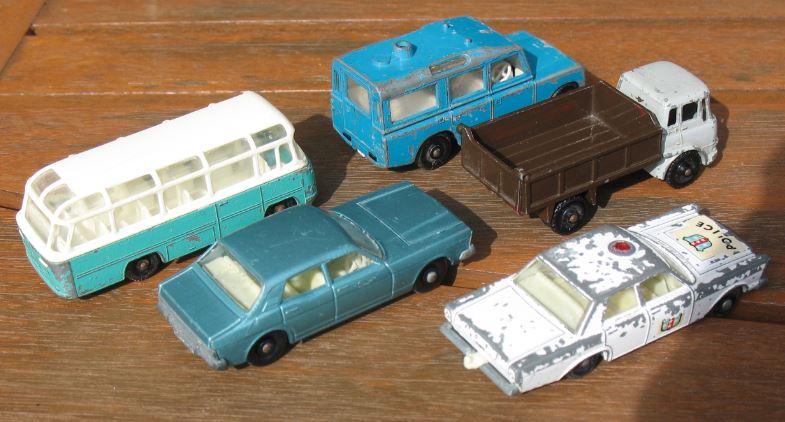
- (c) Malibu
- News_03102015_2.JPG (69.7 KiB) Viewed 904 times
Stephan
Re: My latest news
Posted: Sat Oct 03, 2015 4:45 pm
by Tinman
Malibu wrote:Tinman wrote:The model in question had to be stepped on, bending down the roof line right in front of the windscreen
I have locked at my other model and I still think that the windscrenn is made for snap in.
Also at pictures in Ebay or elswhere it looks the same to me.
It is not intended for any reason other than to fill the gap made for the roof beacons. It is Not designed to "snap in."
Re: My latest news
Posted: Wed Oct 07, 2015 7:10 pm
by Malibu
Hi,
today a friend gave me this bunch of models.
No I have the Pickfords completed.
All models need cleaning some are for repaint or will be restored.
Stephan
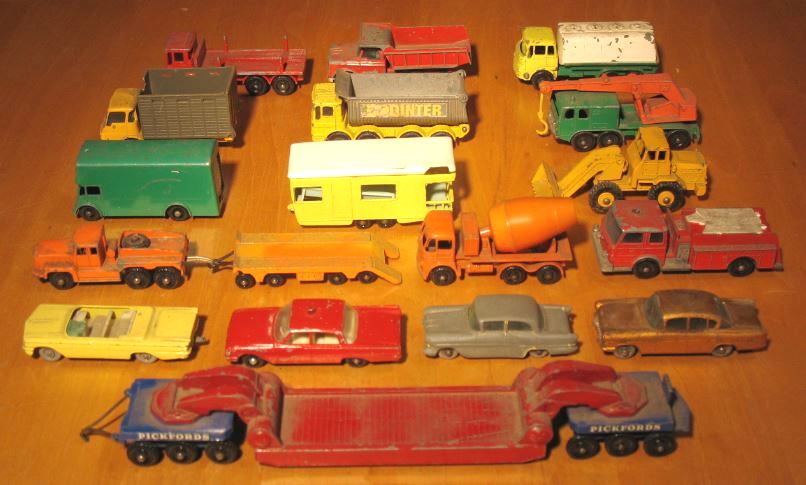
- (c) Malibu
- News_07102015.JPG (66.65 KiB) Viewed 848 times
Re: My latest news
Posted: Wed Oct 07, 2015 7:17 pm
by johnboy
Hello Malibu, that's a nice gift. Has the Fairlane been repainted?
Re: My latest news
Posted: Wed Oct 07, 2015 8:04 pm
by fixer
that's what i was wondering JB it should have a white roof beacon if it's a fire chief one
tried to blow the image up can't see any obvious sign of a repaint


