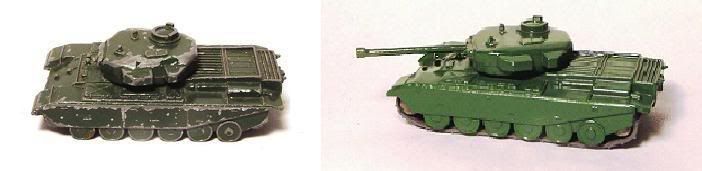
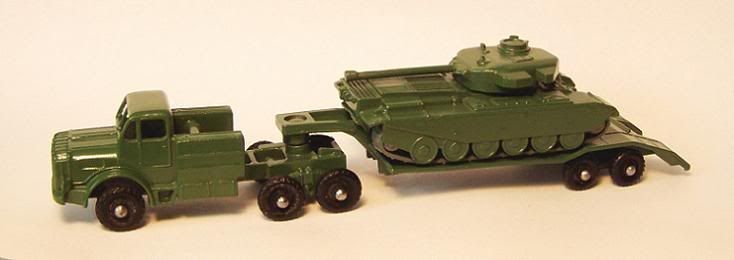
The problem with the play worn tank is that they are nearly always missing the treads and always missing the cannon barrel. That was the case with my beater set. The truck and lowboy is a straight forward strip and repaint, so I'm just going to deal with the tank . Here is the tank 's before photo:
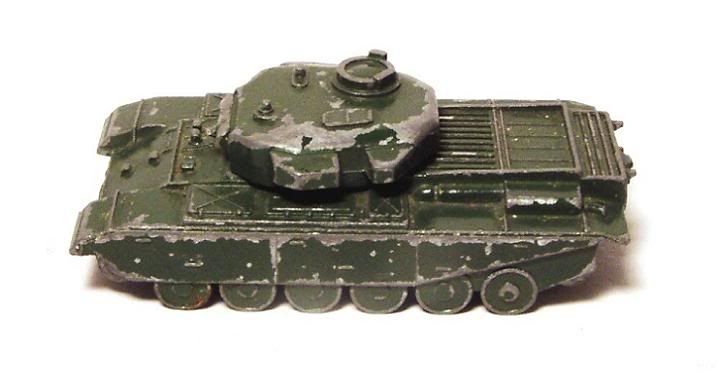
Yep, the tracks and the gun barrel are missing:
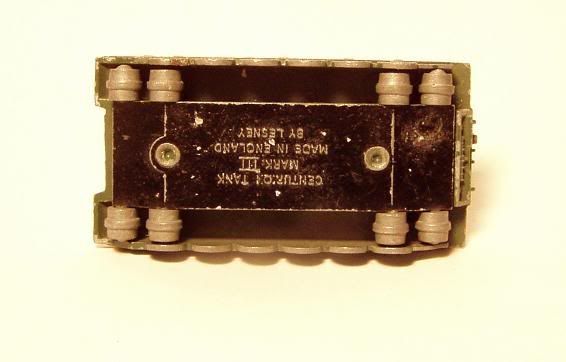
When I repaired this tank , I didn't think about doing a "how to" until I was ready to assemble the parts. I'd like to have more pics, but I'm going to detail the steps required to get to the finished product. First, drill off the base rivets and remove the base.
Before we take off the turret, take a small drill bit on the Dremel and make a pilot hole in the turret rivet post. This will be needed for the train screw which will hold the restored turret on the tank. After the pilot hole is finished, drill off the rivet head and remove the turret.
Using the same bit I used for the pilot hole, I am going to drill a hole in the turret where the broken off gun barrel used to be. There is a tiny nub of the broken barrel and I file that flat with a needle file. Take a dental pic and twist that around on the center of the barrel location (this will make a centering spot so the drill bit does not wander). Drill all the way through the turret, into the exposed underside of the turret's casting.
I selected some stiff wire which mimics the size of the gun barrel and is ever so smaller than the hole I just drilled in the turret. Now, the wire needs to look like the gun barrel: I begin by building up a droplet of solder on the tip of the wire. You could also use epoxy, but I didn't want to deal with any drying time.
Place the wire into a drill with the solder or epoxy part sticking out. Spin up the drill and using a small needle file, work the tip of the wire to the shape of the gun barrel. The wire in the drill makes a mini lathe and the file is your cutter. Very quickly, you can shape the tip to mimic the tank 's gun.
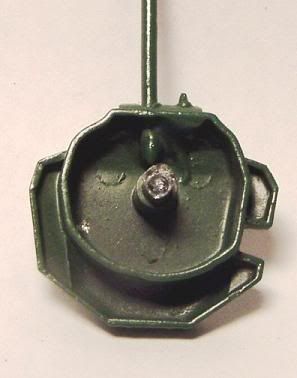
Once the tip is shaped, trim the wire so it is the correct length and allow enough extra to go through drilled hole and into the interior of the turret's underside. Position the new barrel and epoxy into place. Here you can see the wire inserted and the epoxy holding it in place (you can also see the pilot hole I drilled into the turret's rivet post).
Before moving on, I want to make mention that you can order a new reproduction replacement turret. I tried one of these and found the casting so poor, that it was unusable (too many deep pits in the casting). One can cut away the replacement casting gun barrel and use it in a similar manner as the wire trick. That is exactly what I did with the casting I had ordered and it made an excellent replacement barrel. However, it's more work and you have to buy the replacement casting.
You can use several things to make the homemade barrel: Brass or aluminum stock from the hobby shop, cold rolled steel wire (stiff wire) or a #4 finishing nail (or maybe it's a #6, I forget). The wire and the nail are obviously the cheapest. Don't be tempted to use the head of a finish nail as the tip of the gun barrel, it won't look right. Take the time to make a decent looking barrel tip. OK, now the turret has a new gun barrel and it can be set aside for primer and paint.
Now we must deal with the missing tracks/treads. You will need a set of replacement treads for the C & D series cats (or the Case tractor). Cut the tracks, using a hobby knife and place them in your painting area. Spray both the inner side and the outter side with gray primer. You need to keep the spray back a ways to avoid blowing the tracks around.
Once the tracks are dry, we are then ready for the next step. You will need a sewing needle and thread for the next part. Flatten out one track and place the base and rollers on top. We will wrap the cut track around bottom of the base and up over each outboard end roller. Using the needle and thread sew the two halves together (see photo).
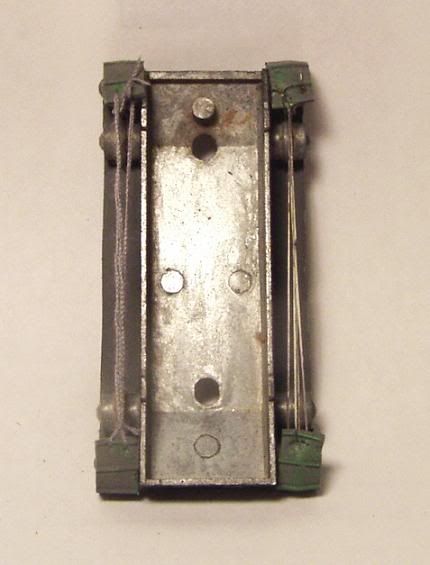
Pull the thread tight (but not so tight as to rip it out of the rubber track) and make at least one pass from each outside edge of the cut track. This will tension the track for the right look.
In an earlier post, I mentioned a way to replace a set of tracks on a minty tank that's fully assembled. It's the same process except you fish the tread/track around through the upper side of the rollers and sew from the bottom. When putting tracks on a mint tank , I cut some thin stiff plastic to cover the exposed rollers. The plastic helps guide the thread as I roll the track around so that the cut area (and thread) are up inside the tank. Slip out the plastic guide and you are ready for the touch up part coming up next.
Once the tracks are in place, all of the handling may have messed up the paint. If you need touch up on the tank treads: Spray some primer in a plastic cup and touch up your paint job using a small detail brush. Unlike paint, the primer will lay out, blend right in and the touch up won't show.
Now the turret is repaired, new tracks are on the base and the tank is ready to reassemble.

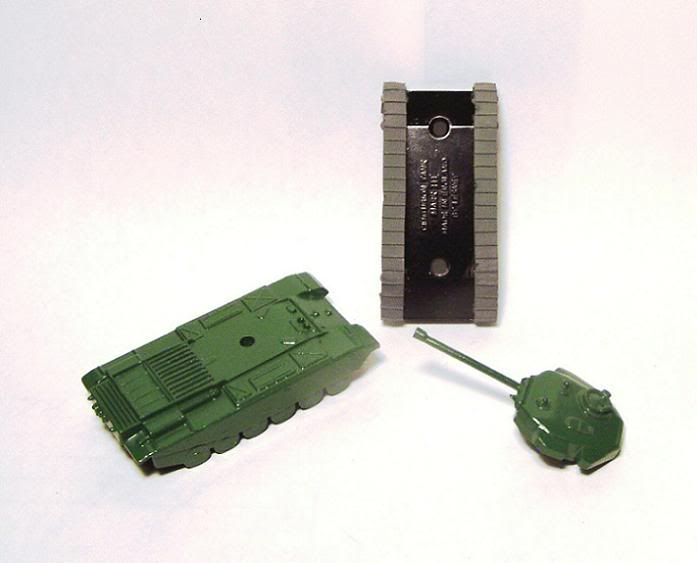
Put the turret on the tank casting and insert a small train screw into the pilot hole that you made in the turret's rivet post. Leave the screw a 1/4 of a turn loose so that the turret will freely rotate. Place the base on the casting and it's done!
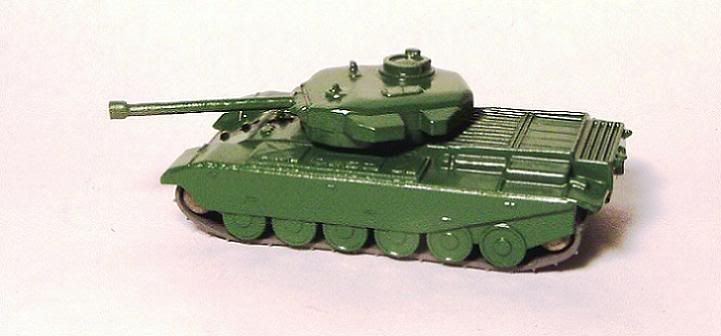
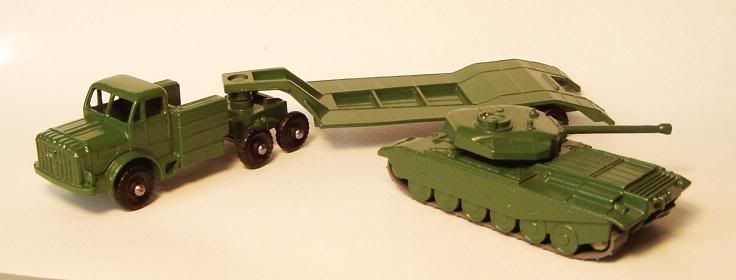
That's how we go from beater to restored tank. Ah, that looks so much better!