
- My goal being to acquire one letter example of each number model in the series.
I don't have pristine in the box models, but rather just an assortment of playworns and some nicer thans. Though I am not able to spend much on my collection I still have fun and enjoy hunting and tracking down the ones that I'm missing...
My collection recently reached a small milestone, when I was finally able to complete finding the letter example, of each of the N° 8 tractors and N° 18 dozers.
Most of models are missing their tracks, as is commonplace with these models
As Joe (Tinman) has mentioned in several of his posts, replacement tracks are readily available viewtopic.php?f=18&t=2881&p=27413&hilit=tracks#p27413
1.50€ a track for a replacement track isn't such a bad price.
But for me, given the condition of the models, in my collection and taking into consideration the number of tracks that I am needing ... well I just can't see myself spending 3€ per model, so that all the boys, can be wearing new shoes.
Yet the models just don't look right sitting there in my display cabinet, on their rollers. So my solution was to have a go at making up my own sets of tracks. This is a first try for me, so I may develop and refine things a bit and get a little better at it, but I’m pleased with the first results.
This is how I made them;
Ingredients:
My homemade tracks are made from a combination of silicone bathtub caulk and corn starch flour with some tempera paint used for the colorant.
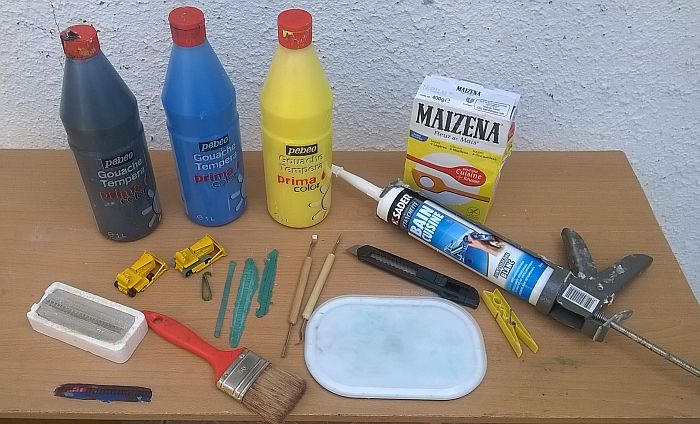
Making the mould:
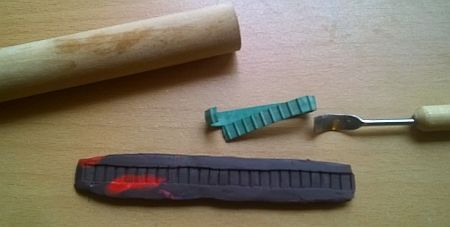
I made a simple mould out of modelling clay (actually I made two different moulds one out of soft clay and the other out of, clay that hardens) I made the impressions in the moulds, by taking a broken original track that I had and rolling it into the clay and thus, had my negative mould for the track that I would be making.
Mixing the putty: (one may wish to use gloves for the next steps)
Next step was to squeeze out a bit of the silicon caulk and gradually work the corn starch into it by folding it in. The caulk eventually becomes less and less sticky to the point where it can be kneaded By kneading the cornstarch into it, it forms into a play-doh like putty.
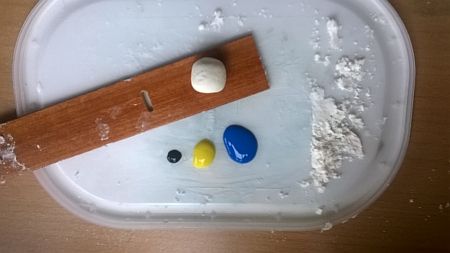
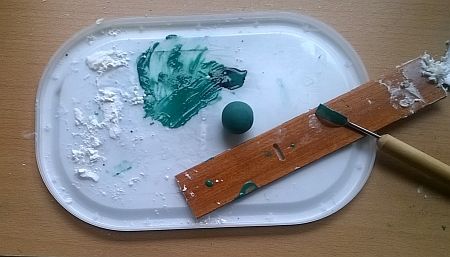
Adding color to the putty: As the putty was white and I wanted my tracks to be green, I needed to color it. I used tempera paint (poster paint) to color the putty. As I didn't have green paint I mixed my own, using a bit of yellow and blue, with just a tad of black thrown in to darken it. I worked the paint into the putty, by continually dipping it into the paint and kneading it in, eventually the color is absorbed into the putty and the putty is then ready to be rolled out and pressed into the mould.
Into the mould:
I rolled out a little strip of the putty into the shape of an oversized spaghetti noodle and then dusted the mould with a bit of the cornstarch, lightly brushing over the mould to remove all excess. Then I gently pressed the putty into the mould, this was followed by rolling the putty into the mould with a small wooden roller.
After that it's then it’s just a matter of waiting for it to set up and cure.
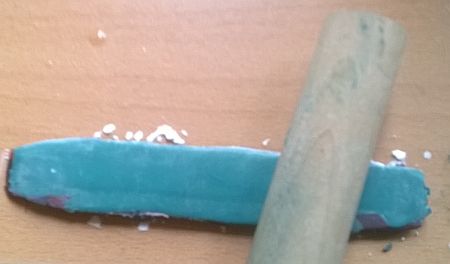
Remove from mould:
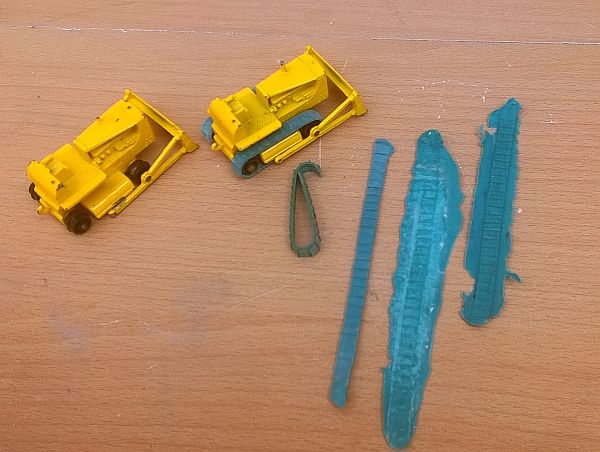
The final steps were peeling the track out of the mould when ready, trimming off the flashing, cutting them to length and gluing the track into a loop-I cut little over lapping flaps on each butt end of each track, put a little silicone on them and pinched them together with a clothes pin until set, to achieve this.
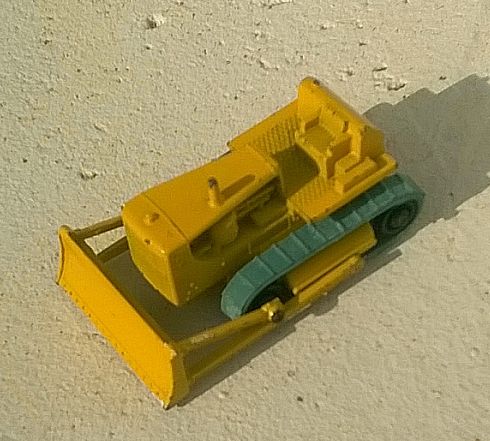
18D wearing it's new homemade tracks
Findings:
These tracks are flexible, supple and elastic -they roll right around on the rollers- While they don't have the quality of factory made tracks, I think they look ok and better than no tracks at all. Now I will just have to see how they hold up over time.
My moulds were rather crude and I’m sure that I could get better results if I refine them a bit and put a bit more effort into them, but this was just a first go around trial. – I’m thinking if I make a proper size extrusion die for my daughter’s play-doh machine, I could then try making fluted rolls of tracks with this mixture.
All in all I'm sure it would have been easier to just buy a set of tracks, but for me that certainly wouldn't have been as much fun, or as satisfying and rewarding as having made my own.
zBret


